Installation on Windows
To develop with the Arcade library, we need to install Python, then install Arcade, and finally install a development environment.
Step 1: Install Python
Install Python from the official Python website:
https://www.python.org/downloads/
The website gives you the option of downloading two different versions: Version 3.x.x or version 2.x.x. The Arcade library requires Python beginning with 3.x.x.
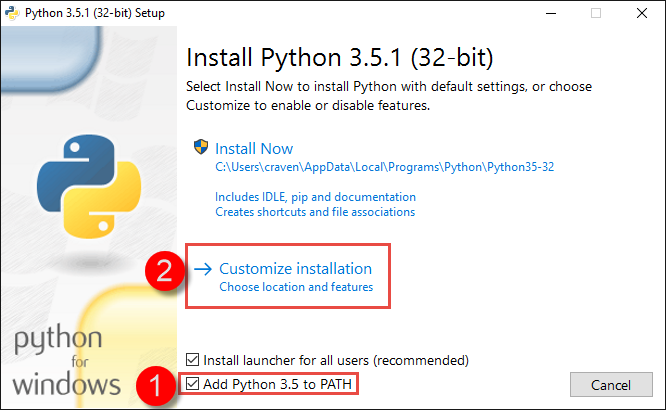
When installing Python, make sure to customize the installation and add Python to the path:
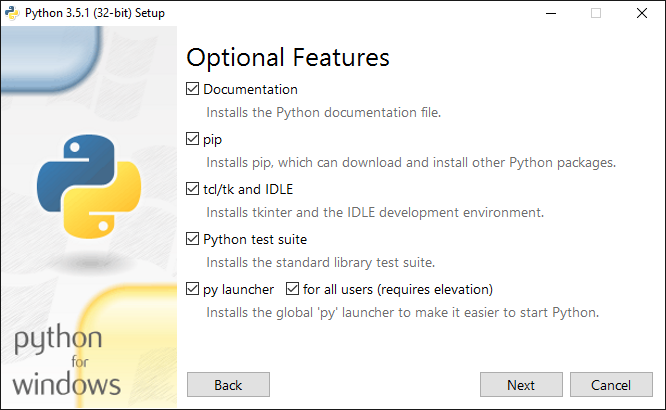
The defaults on the next screen are fine:
Then install Python for all users:

A video of the installation is below:
Step 2: Install The Arcade Library
Install Arcade The Easy Way
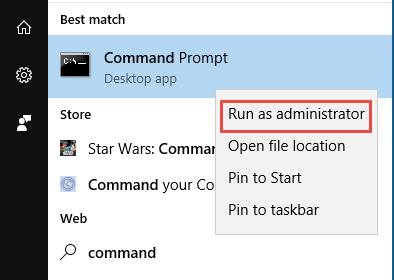
Click the Window button in the lower left of your screen (or hit the window
button on your keyboard) and start typing command prompt.
Don’t just run the Command Prompt, but instead right-click on it and run as administrator.
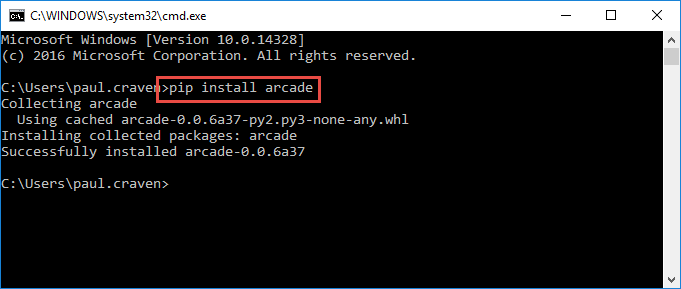
Next, type pip install arcade at the command prompt:
The video below steps through the process:
Install Arcade The Hard Way
If you successfully installed Arcade the easy way, skip this section. If you’d rather download the Arcade library directly off PyPi you can at:
https://pypi.python.org/pypi/arcade
Or you can get the source code for the library from GitHub:
Step 3: Install A Development Environment
Get and set up one of these development environments:
- PyCharm. Arguably the most popular option. But with so many features it can be overwhelming when getting started.
- Sublime. This is more complex to set up for Python, but by far my favorite editor. Spend 20 minutes to watch tutorial videos and you will save a lot of time later. Anaconda is a great Sublime plug-in for doing Python development.
- Wing (costs money) or Wing 101 (free but less powerful)
- Or pick your own environment